Posts

Showing posts from February, 2014

My Master bedroom Retreat

Image
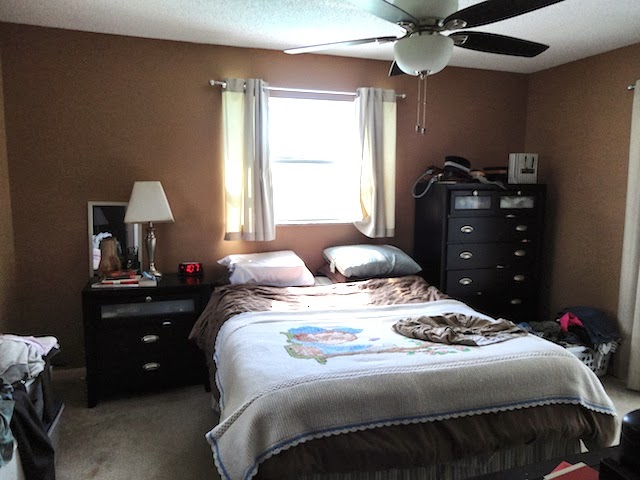
Before Master bedroom  We were very lucky when we moved into our house that new hardwood floors were in all the bedrooms, crown molding and larger base boards.  The only odd thing about this bedroom was the single light bulb that was hanging from the ceiling.  After Master bedroom I painted the walls Quiet Moment by Behr. The night stands and dressers are from Ikea. The night stands and dressers will be on my list of revamping this year. My husband and I made the bench at the foot of our bed. Because we have a window above our bed we didn't get a headboard. Instead I tried to use the window as a decorative backdrop to our bed. Thanks to Pinterest I learned how to make window Cornices using foam board and white duct tape. The cornices over the windows dresses up the drapes. Here is a close up of the Window cornice. 

Making a decorative mirror with Driftwood

Image
How to make a Decorative Mirror with Driftwood  On a vacation visiting my In Laws last year we took out the boat to check lobster traps. I had been talking to my husband about getting driftwood from Maine to bring home for a project. While checking the lobster traps in the bay we stopped and checked out one of the islands for driftwood.  I hit the Jack Pot! I was also lucky that my Father in Law had a hand saw on board the boat. I picked out the driftwood I liked piled it on the boat and sent it home in a box back to Florida.  Here is what you need to make the mirror Different shapes and sizes of driftwood I picked out a $14 mirror from Ikea,  Kolja round mirror . The mirror is 22" in length and width. Bought I piece of Plywood from Home depot cut to 2ft x 2ft. I also bought a hanging kit to attach to the plywood. Rustoleum White spray paint with Paint and Primer. - I spray painted the front of the plywood white.

Master Bedroom Retreat Makeover

Image
Before Master Bedroom View of the bedroom from the sliding glass door. The bed was on the wall to left of the sliding glass door. Dresser was directly across from the bed. The before issues the couple had with their bedroom was the need to have a bedroom retreat to relax. The room was cluttered, the bedroom furniture was crowding and cramming area's of the room. The color of the room, curtains and bedspread/sheets clashed with the color of the furniture. The room was lacking a unified color scheme. After Master bedroom Shorter dresser now sits on the wall were the bed was placed. The tall dresser went on the opposite wall of the shorter dresser. The wall with the sliding glass door The furniture was rearranged to make the room open and spacious. The furniture was spaced out through the room so not to crowd the space. The walls were painted Sparrow by Behr, new larger baseboards replaced the small baseboards and were painted

My obsession with Hutch makeovers

Image
Before thrift Store hutch Thanks to Pinterest I learned "how to" make a spray paint tent. A few PVC pipes cut to fit inside the garage and plastic drop cloths make a great tent. After Hutch Steps to "Making over" the thrift store hutch Things you will need - Easy Liquid Sander Deglosser - Sandpaper 120 Medium Smooth - Paint sprayer, I used Wagner Optimus 5.4 Sprayer - Hi-gloss enamel Ultra pure white paint by Behr - Carrot Cake by Valspar inside hutch - 2-3/4 in. Pine Taper bun foot - High Density foam paint rollers for painting inside the hutch - Blue painters tape -  Optional - 6 plastic drop clothes - Roll of painters tape - 12 PVC pipes, you will need 6 PVC pipes cut to create the top and bottom square frame of the tent. 4 PVC pipes cut to the height you want for the tent. - 6 PVC pressure 90 degree slip x slip elbow with taped side outlet to connect the pipe together. Steps 1.

Before & After Dinning Room

Image
Before Dinning Room  After Dinning Room  I painted the dinning room Shaved Chocolate by Behr. To add some texture to the room I created white picture frames with decorative moldings from home depot.  The hutch was a thrift store find as well as the chandelier.  This the wall opposite of the hutch, The table was another thrift store find and the mirror is from Ikea.

My $39 hutch makeover

Image
Christmas Present to my Sister! I found this hutch for $39 at my local thrift store. I wanted to give my sister the christmas gift of furniture. I spray painted the outside of the Hutch Dark Pewter by Behr. The inside I used Silver Screen by Behr. I picked out the same Ikea hardware my sister has on her kitchen cabinets for the handles on the hutch. You can't see it in this photo but I also installed a light inside the cabinet. I went to home depot and bought under cabinet halogen lights .  By the time this project was finished I spent - Hutch $39 - Under cabinet halogen lights $19.97 - Gallon of Dark Pewter paint w/primer & $32  - Quart of paint silver screen $15 Total price $105.97 The look on her face PRICELESS

Family Room Makeover

Image
Before Family Room  After Family Room This room needed the most improvement when we moved in. We had to demo the walls to remove the stucco covering old wood paneling. After new drywall through the space we added decorative molding and painted the room Cedar Green from Behr. I made this mirror and frames using driftwood I brought back from my vacation in Maine.  The coffee table and end table were thrift store finds. I paid $10 a table.   The tile through the entire house had to be replaced. I didn't want the typical tile you see in most Florida homes. I decided on  porcelain plank tiles.  The family room sits off the kitchen but in the middle of the walk way to the spare bedrooms and bathrooms. I wanted this space to be used for multiple functions, I was able to create an area for eating and a family room to sit and watch TV together.